Wednesday, January 17, 2018

Cheap DIY Cake Stands


DIY Cake Stands

 On A Budget


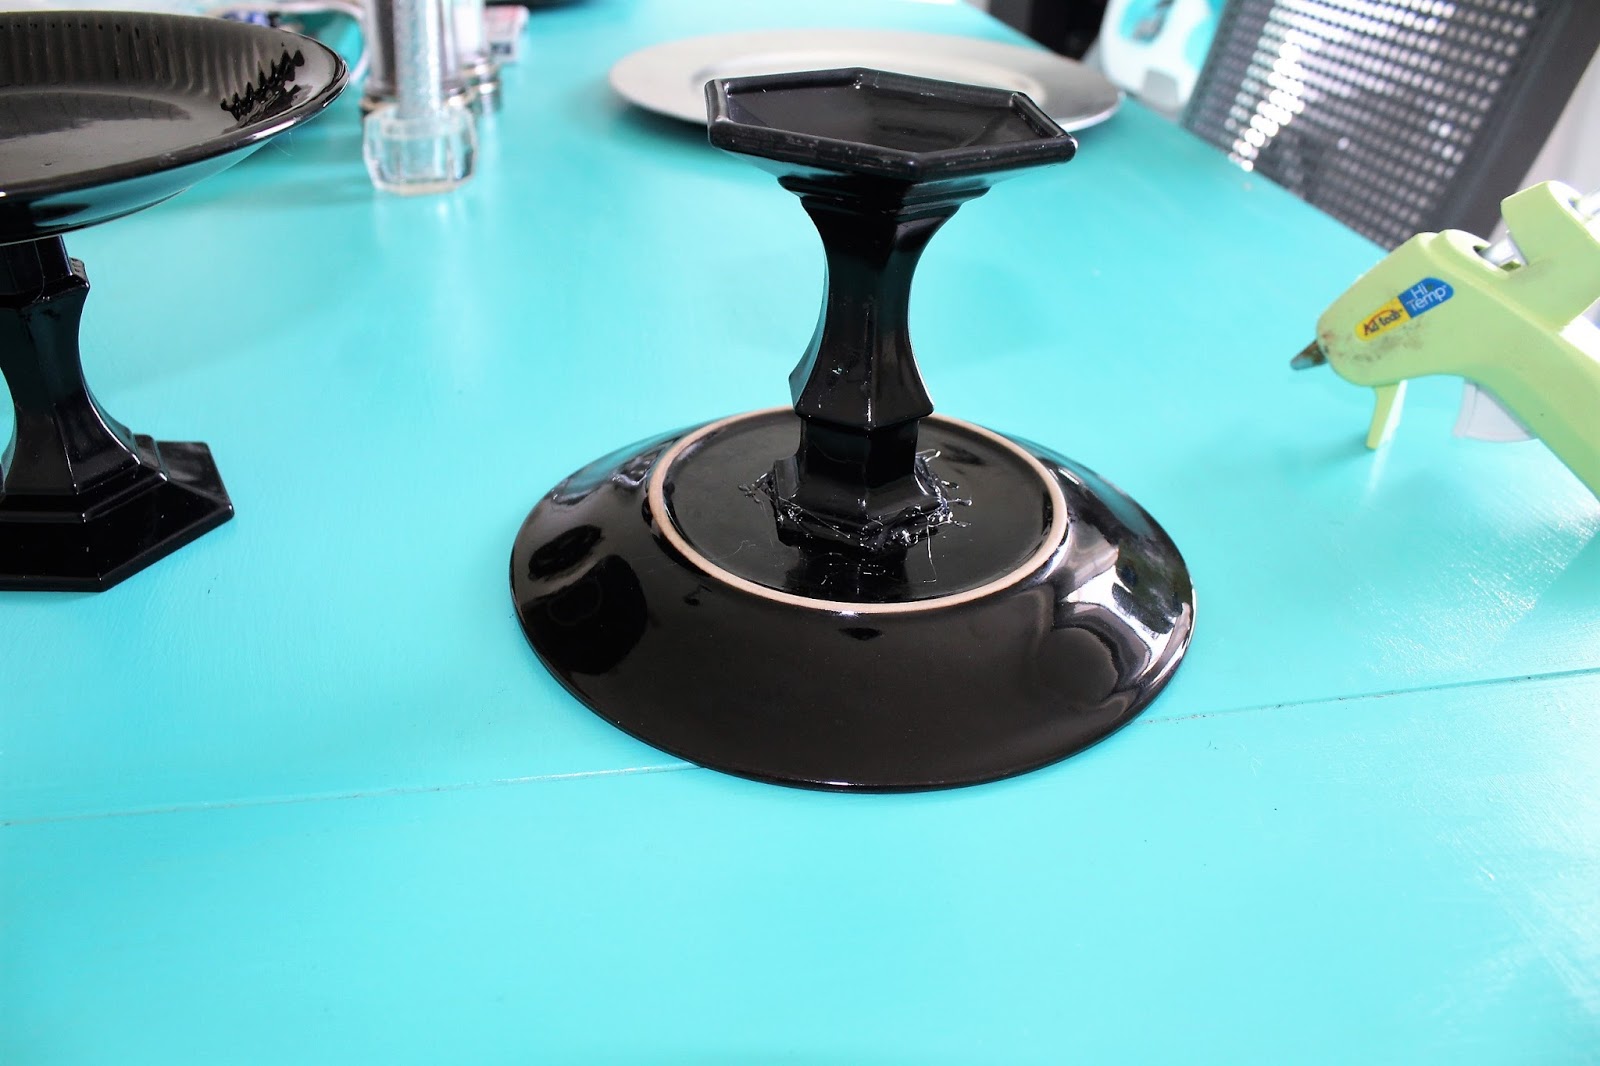
These stands are absolutely adorable and so quick and easy to make! All of the items you need can be purchased at your local dollar store or thrift store. I decided to make two mini stands and 1 large stand. I purchased three candle holders (2 small, 1 large), one large dinner plate, and two small appetizer plates. I already had the paint and hot glue gun so I didn’t have to buy those. The entire project cost less than $10.00!

The two smaller candle holders I just spray painted black to match the theme I was going for. You can paint them any color you want. I left the larger one as is for now, but I may go back and paint it another color later.


Once you have painted the bases (which is completely optional) it’s time to glue them to your plates! I recommend getting plates in whatever color you are wanting and not painting those. If you can’t find what you want, and you do end up painting plates, just always make sure that you are putting something between the painted plate and your food.

You do have to work fast using the hot glue because it will dry quickly. I found that doing a dry run first and marking the center point on the plate really helped when attaching the two pieces. Place the plate upside down on the table. Put your glue on the top of your candle holder and press it down on the plate. Once attached run a bead of hot glue around the outer rim of the candle holder to help hold it to the plate. Let dry for a few hours before using.


After it’s completed dried you are ready to put it to good use! I have used them multiple times for get togethers and I just love them! Three stands for under $10 you really can’t beat it!


I hope you enjoyed this DIY. If you give it a try; please post some photos of yours in the comments! I’d love to see your personal take on these.


Wednesday, October 11, 2017

Creamy Baked Potato Soup


Here we are in October and we finally got a couple of days under 80°! I was so excited that I decided to make one of my fall favorites for dinner. This potato soup is a mix of a couple different recipes I have tried and altered to our needs and tastes. If you are looking for some amazing comfort food in under an hour then this is the soup for you!


What you need:
·     6 Russet Potatoes, Peeled & Cut Into 1” Pieces
·     2 Small White Onions, Chopped
·     1 Tbsp. Minced Garlic
·     2 Tbsp. All-Purpose Flour
·     3 Tbsp. Extra Virgin Olive Oil
·     4 Cups Chicken Broth (32 oz.)
·     ½ Cup Half & Half
·     1 Cup Shredded Cheddar Cheese, (plus more for topping)
·     1 lb. Bacon, Cooked & Crumbled
·     Green Onions, Chopped (optional)

How to make it:
1. Bring water to a boil in a medium pot. Add potatoes. Meanwhile cook bacon on a non-greased cookie sheet in a 425° oven for 20 minutes; flipping half way through.
2. While the potatoes and bacon are cooking; sauté onions with olive oil in a large pot over medium heat for 8 minutes before adding garlic and cooking for 2 more minutes. Add flour and stir well. Scrape any burnt bits from the bottom while slowly adding chicken broth and then the cheese. Stir.
3. Once potatoes are cooked; drain and lightly mash. Personally, I like to leave some bigger chunks of potato for my soup. Add potatoes to soup and reduce heat. Remove bacon from oven. Drain, crumble, and set aside.
4. Add half & half to soup and simmer 5 minutes.

Serve topped with shredded cheese, bacon crumbles, & green onions. The perfect comfort meal for a chilly fall day! Or… if you’re from Texas; any day that in the 70s or less. 

Friday, October 6, 2017

Hello There Stranger!

Hello everyone! I know, I know... it's been forever! Where do I even begin? 
It's been so long since I have posted and boy has life changed dramatically! I am so blessed to be mommy to a very spunky 5 month old boy! He is such an amazing little man and he lights up my days and keeps me on my toes (not to mention exhausted).


I know that I have been majorly neglecting Hello Lucybelle, but since giving birth to my son I felt it was so important that I really focused on bonding with him and getting accommodated to my new role as mommy. Something that is no easy feat. Add battling unchecked Fibromyalgia to juggling caring for an infant, cooking, cleaning, looking after 4 dogs and let's not forget remembering to be a wife as well... Needless to say I have not had much time for showering; much less writing. Don't get me wrong. I'm not complaining. I wouldn't trade the chaos for anything! My life may not be perfect, or even easy, but it's amazing and more than I probably deserve. I have the most understanding and patient husband, my miracle rainbow baby, a roof over my head, and food on my table. What more could I ask for? 

 I am excited to get back to posting and working on improving Hello Lucybelle! If you have any suggestions or questions, please feel free to comment below or send me an email directly! 

Chocolate Loaf Bread


This is one of my favorite recipes to make when I want something sweet, but not too sweet. To be honest; I usually make it to have for breakfast with coffee in the mornings. 

The recipe makes two 8" x 4" loaves. While I probably could eat both in just a couple of days, I usually either give the extra loaf away or hold off on topping it with the chocolate glaze and freeze it for later. 

Well, let's get to it then!

What you'll need:

Loaves:
  • 1/2 cup butter (no substitutions)
  • 2/3 cup packed light brown sugar
  • 1 cup semisweet chocolate chips, melted
  • 2 eggs
  • 2 tsp. vanilla extract
  • 2 1/2 cups all-purpose flour
  • 1 tsp. baking powder
  • 1 tsp. baking soda
  • 1 1/2 cups applesauce
Chocolate Glaze:
  • 1/2 cup semisweet chocolate chips
  • 1 Tbsp. butter  (no substitutions)
  • 5 tsp. water
  • 1/2 cup powdered sugar (more for dusting if desired)
  • 1/4 tsp. vanilla extract
  • Dash of salt
How you'll do it:
  1. Pre-heat oven to 350 degrees. In a large mixing bowl, cream butter and sugar. Add the melted chocolate, eggs, and vanilla; mix well. In a separate bowl, combine the flour, baking soda, and baking powder. Add to creamed mixture alternately with applesauce.
  2. Divide batter among two greased loaf pans. Bake in oven for 50-55 minutes or until a toothpick comes out clean. Cool for 10 minutes before removing from pans to wire racks. Cool completely.
  3. For chocolate glaze combine chocolate chips, butter, and water in a saucepan.  Cook and stir over low heat until chocolate is melted. Remove from heat; stir in powdered sugar, vanilla, and salt. Drizzle over cooled loaves. Once chocolate glaze has cooled, dust loaves with reserved powdered sugar if desired. 
*** For even more of a chocolate explosion mix in 1/2 cup miniature chocolate chips to the batter before baking. ***


Monday, February 13, 2017

Free Commercial Use Fonts

Here are some of my favorite fonts for FREE personal & commercial use! So craft away my loves and feel free to sell your products using these great fonts!

Check out the links below to download and install the fonts on your computer. 


I hope enjoy the fonts! Comment below if you would like to see more posts like this.

Free personal use fonts


Here are some of my favorite fonts for FREE personal (not commercial) use!

Check out the links below to download and install the fonts on your computer. 


Coming Soon: I will be compiling a list of my favorite free fonts that you can actually use for commercial use as well.


I hope enjoy the fonts! Comment below if you would like to see more posts like this. 

Sunday, February 12, 2017

Bump Updates for weeks 24 & 25

I completely forgot to post last week so I will be posting both week 24 & 25's updates and recaps!  

24 WEEKS:

How far along: 24 Weeks
Total weight gain: 18 lbs.! I only gained 1 more pound, but it feels like so much more!
Maternity clothes: Oh yeah!
Stretch marks: Still none to be found!
Sleep: Elijah is preparing me to never sleep again…
Best moment of this week: Hearing my little man’s heart beat at the dr’s office.
Worst moment of this week: Hmm… having family belittle your feelings regarding your own event & realizing you sometimes have to let go of your “best friend” when they stop being your best friend… no matter how many years you have been together. Sometimes life happens & people grow apart. And that’s ok! It doesn’t mean it sucks any less though.
Miss anything: Life without heartburn…
Movement: He’s a movin’ & a grovin’ lately!
Food cravings: Strawberries and tacos!
Anything making you queasy or sick: If I try to make myself eat something I am not really in the mood for.
Have you started to show yet: Yes.
Gender: Boy!!
Labor signs: None.  
Belly button in or out: Almost popped out, but not quite there. 
Wedding rings on or off: Off! On a chain around my neck.
Happy or moody most of the time: Happy 
Looking forward to: Getting our tax return so I can finish furnishing the nursery! 


25 WEEKS:


How far along: 25 Weeks
Total weight gain: We are up to 21 lbs. now.... :( 
Maternity clothes: Oh yeah!
Stretch marks: Still none to be found!
Sleep: Whats that?
Best moment of this week: Valentine's dinner date with the hubby at my favorite restaurant!
Worst moment of this week: Elijah decided to stop moving for a while. We had to make a little trip to labor & delivery for some monitoring. He was doing just fine, but he gave mommy quite a scare!
Miss anything: Vodka... this week, vodka.
Movement: He barely moved at the beginning of the week, but now he has barely taken a break!
Food cravings: Strawberries and tacos.... still.
Anything making you queasy or sick: If I try to make myself eat something I am not really in the mood for.
Have you started to show yet: Yes.
Gender: Boy!!
Labor signs: None.  
Belly button in or out: Halfway popped out. 
Wedding rings on or off: Off! On a chain around my neck.
Happy or moody most of the time: Moody
Looking forward to: Baby shower #1 is in 2 weeks and #2 in 3 weeks! I can't wait!!!